A very appetizing and easy-to-make Yin and Yang cake that will decorate any feast. Airy, porous and slightly moist chocolate cake, dry crumbly meringue, sweet, delicious condensed milk cream and chocolate icing create an amazing, very successful combination.
In order for the chocolate cake to turn out dark and have an excellent taste, it is necessary to use only high-quality cocoa (with a characteristic smell and taste) for its production. It is advisable to use sunflower or corn oil (odorless) so as not to spoil the taste of the finished product.
You can prepare whipped egg white cakes in advance and store them in a plastic box, carefully sealing it with a lid. To do this, you need to beat raw egg whites with the recommended amount of sweetener until they form an airy, fluffy foam. After this, you can form small cakes and place them in the oven (temperature 100 degrees) for 90-120 minutes.
If you don’t know how or don’t have the opportunity to prepare protein shortcakes yourself, you can buy the finished product at any supermarket.
From this number of components, a cake weighing 1000-1200 grams is obtained. If you are going to prepare "Yin and Yang" for a banquet table, you can make it with a double portion of the ingredients.
To prepare chocolate cake with meringue “Yin and Yang” you need:
- 1.5 tbsp. flour;
- meringue from 3 eggs and 1 tbsp. refined sugar;
- butter for filling (100 grams);
- 0.5 tbsp. boiling water;
- 1 tbsp. sweetener;
— condensed milk (1 can);
- 2 tbsp. cocoa;
- ¼ tbsp. oils;
- 1 tsp. soda;
- raw egg (1 pc.);
- ready-made chocolate glaze;
- dairy product (0.5 tbsp.).

Preparing the Yin and Yang chocolate cake:
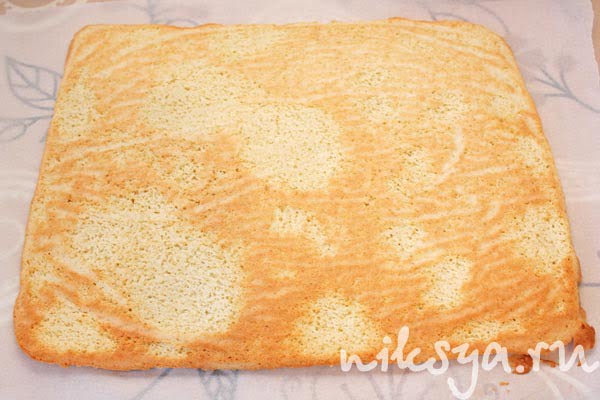
1. Pour all the dry ingredients into a bowl, mix them until smooth.

2. Prepare the egg mass: beat a raw egg with a culinary mixer, add vegetable fat, mix the ingredients.

3. Pour the dairy product into the bowl with the preparation.

4. Add the chocolate-flour mixture to the liquid mixture.

5. Make the mass homogeneous.

6. Enter 0.5 tbsp. boiling water Mix the ingredients thoroughly, pour the chocolate mixture into the mold (treat it with any fat). Place the chocolate mixture in the oven (180 degrees), wait 27-32 minutes.


7. Prepare the cream: beat the boiled condensed milk, add soft butter.

8. Cool the finished custard cake and cover it with a layer of filling.

9. Place meringue pieces around the entire perimeter of the cake.

10. Dip the remaining protein cakes into the cream and place on the crust.

11. Cover the cake with the remaining condensed milk. Cool for 1-2 hours.


12. Fill the top of the baked goods with melted chocolate glaze and cool for a few more hours. Enjoy the original Yin and Yang chocolate meringue cake at any time.
Recipe with photo: “Chocolate cake with Yin and Yang meringue at home” prepared lulul
02/21/2011 Niksya
This cake is essentially two completely different cakes. The idea itself came to me when I ordered a metal form in the shape of a comma from an online store. It was meant to be somewhat smaller and perfect for assembling beautiful cakes. But the shape turned out to be large, heavy and of high quality - it cannot be bent or bent. And looking at it, there was no doubt at all where it would be used. I have already seen this cake in my imagination.
Yin - black, feminine, internal, earthly - will be represented by a chocolate-coffee sponge cake with chocolate-caramel cream.
Yang - white, masculine, external, heavenly - will be embodied in a delicate protein-coconut sponge cake with coconut custard.
Each cake is good in its own way and the complete opposite of each other. If the first one has a bright aroma, a long aftertaste, an invigorating and, I would even say, somewhat sharp taste. Then the second one is tender, airy, very delicate. They are completely consistent with their archetypes.
In order to prepare it, you do not need to have the same metal mold. I specially selected the ingredients so that there would be no need for a supporting form while the cream hardened. In this connection, you can simply cut out the desired stencil from paper and use it to cut out your biscuits.
Ingredients:
200 g flour
25 g potato starch
100 ml, room temperature
3 large egg whites, room temperature
1 tsp.
175 g granulated sugar
1 tsp. baking powder
1/2 tsp. salt
43g unsalted butter, softened
Coconut cream:
400 g milk
2 cups coconut flakes
1 vanilla pod
3 yolks
130 g sugar
3 tbsp. l. flour
60g unsalted butter, softened
Chocolate coffee sponge cake:
230 g softened butter
100 g powdered sugar
12 g baking powder
50 g cocoa
1 tbsp. l. instant coffee
185 g yolks
200 g flour
100 g sugar (for proteins)
220 g proteins
a pinch of salt
45 g dark chocolate (at least 60-70% cocoa)
100 cream 33%
100 sugar
25 water
1 tbsp. l. honey
113 g butter
Decoration:
Grated dark chocolate or black confectionery sprinkles
coconut flakes
Preparation:
Preheat the oven to 180C.
Whisk together coconut milk, egg whites and vanilla extract. Beat lightly with a whisk.

In a mixing bowl, combine flour, starch, sugar, baking powder and salt. At low mixer speed, mix everything for 1-2 minutes. This way we saturate the biscuit with oxygen.
Add butter in small portions. Continue mixing at the same speed until everything is crumbly.
If you don't have a food processor, you can sift the dry ingredients through a fine sieve several times, and then rub them with your hands with the butter.

Add half of the liquid coconut mixture - mix on medium speed for 1.5-2 minutes. Add the remaining half of the milk and beat for another 30 seconds.
Finally, stir the dough with a spatula until it becomes homogeneous.

Line a baking sheet with parchment paper and place the dough on it. Level it out.

Bake in preheated oven for 20 minutes.
Remove and turn the cake over onto the prepared surface with the paper side facing up. Remove it and let the cake cool completely.
Then use a stencil to cut out the required shape. Its dimensions: length 22 cm; width: the widest part is 16 cm, the narrowest part is 2 cm; depth (just in case) 7 cm

This should result in three cake layers.

Place the biscuits on top of each other, wrap in cling film and set aside for now.
Chocolate coffee sponge cake:
Preheat the oven to 160C.
I borrowed the base of this biscuit from. To brighten the taste, I just added instant coffee, but if you are not a fan of this drink, the taste of your cake will not suffer much if you remove this ingredient from the general list.
Beat the egg whites until light foam. Gradually add sugar and continue beating until soft peaks form.

Cream softened butter and powdered sugar until fluffy and creamy.

Lightly beat the yolks with a fork until they lose their structure and become liquid. Pour them into the whipping butter in a thin stream. Keep in mind that if you add the yolks all at once, the butter may separate.
Sift together flour, cocoa, baking powder. Add instant coffee.
In several stages, alternately, add the whites to the buttery cream, gently mix from bottom to top. Then add flour and mix again until combined.

Line a baking sheet with parchment paper and place the chocolate-coffee sponge cake on it. Level with a spatula.

Bake in the preheated oven for 20-25 minutes, or until a toothpick comes out clean.
Remove the biscuit, turn it over onto the prepared surface and remove the paper. Let cool, then cut out 3 shapes using the stencil.

If you use Luca Montersino’s sponge cake for your cakes in the future, I would like to add his video master class. In the first part, a white sponge cake is prepared, which is made using a slightly different technology. (if necessary, I will translate); in the second chocolate. This amount of ingredients is designed for 2 molds of 18 cm in diameter, or for 1 standard baking sheet, like mine.
Stack the cooled and cut out biscuits on top of each other, wrap in cling film and set aside.

You will be left with a fairly decent amount of sponge “scraps” that can be used for or in a cake.
In a bowl, whisk the yolks, sugar and flour until well combined.
Pour the milk into a small, thick-bottomed saucepan and add the coconut flakes.
Clean the seeds from the vanilla bean and add them and the bean to the milk mixture. Heat the pan over medium heat, stirring, but do not bring to a boil. When the milk begins to boil, add all the whipped yolks to the milk at once. The yolks will rise to the surface.
Do not stir, let the mixture reach the point where the milk begins to boil, i.e. the milk will begin to come out between the walls of the pan and the eggs, and volcanoes will form in the center. At this point, whisk the yolks with milk until a homogeneous mass is formed, literally even less than a minute.
Remove from heat, add chopped butter and stir until melted. Then leave to cool in a cold water bath, stirring occasionally.

Coat white cakes with this cream.

Spread the remaining cream over the entire cake. Don't worry about uneven or rough surfaces because... all this will be disguised under coconut sprinkling.
Break the chocolate into pieces.
In a small saucepan, bring the cream to a boil and set aside.
In another heavy-bottomed saucepan, combine sugar, water and honey. Bring to a boil, but do not stir. The sugar should become amber in color, about 6-8 minutes. As soon as this happens, add hot cream to the caramel. Stir. Be extremely careful during this process.
Remove the pan from the heat, add the chocolate and stir with a whisk until it is completely dissolved.

Place in a cold water bath and, while cooling, stir continuously. You will feel the mixture getting thicker.
Once the chocolate caramel has cooled to room temperature, place it in a mixing bowl or food processor and beat on medium-high speed while gradually adding the softened butter. Once all the butter has been added, continue beating on high speed until fluffy and creamy.

Layer the dark sponge cake with the resulting cream, and apply the rest over its entire surface.

Refrigerate for at least 2 hours, preferably overnight, to allow both cakes to soak and set as thoroughly as possible.
Assembly:
The entire surface of the Yin cake (chocolate) sprinkle with grated chocolate. So that the chocolate does not stick together, but turns out to be beautiful shavings, put it in the freezer for 30 minutes to 1 hour. Then grate on a medium grater. Under no circumstances should you handle the shavings with your hands, they will melt immediately - either with a wide knife or a teaspoon. And apply to the entire surface of the cake. It is best to let “Yin” stand for 10-15 minutes at room temperature, then the chips will stick to its surface better.
In my case, I used chocolate confectionery sprinkles in the form of thin needles.
But, do not forget that “Yin” and “Yang” depend on each other, create constant movement, rising and falling like waves, and maintain mutual harmony. Just as a man and a woman are partners in dance, in love and in life, “Yin” and “Yang” are not only opposite, but also harmoniously complement each other. There is no absolute “Yin” or absolute “Yang”; in every phenomenon, both are necessarily present.
Therefore, we must not forget to add a piece of soft, airy coconut to our chocolate cake with sharp needles. How it's done:
Before you cover the cake with decor, cut out a circle of the desired diameter from paper. It should not be very large, but not too small either. Place it in the middle of the widest part of your cake. Then apply decor to the entire surface. Remove the circle and into this clean, creamy part, add the coconut flakes using a teaspoon.

Over the entire surface of the Yang cake ( white) Apply coconut flakes, in the same way, not forgetting to leave a circle for dark chocolate or confectionery decoration.

Assemble the cake by pressing both pieces tightly together on a serving platter.

Place in the refrigerator before serving.
Innings:
What’s good about this cake is that in one tea party you can enjoy two completely different types of cake:
Chocolate-coffee with chocolate caramel.

And coconut, with delicate custard coconut cream.

And, believe me, no one can definitely tell you which one is better. Because everyone complements each other.

Enjoy your tea!
02/21/2011 Niksya
This cake is essentially two completely different cakes. The idea itself came to me when I ordered a metal form in the shape of a comma from an online store. It was meant to be somewhat smaller and perfect for assembling beautiful cakes. But the shape turned out to be large, heavy and of high quality - it cannot be bent or bent. And looking at it, there was no doubt at all where it would be used. I have already seen this cake in my imagination.
Yin - black, feminine, internal, earthly - will be represented by a chocolate-coffee sponge cake with chocolate-caramel cream.
Yang - white, masculine, external, heavenly - will be embodied in a delicate protein-coconut sponge cake with coconut custard.
Each cake is good in its own way and the complete opposite of each other. If the first one has a bright aroma, a long aftertaste, an invigorating and, I would even say, somewhat sharp taste. Then the second one is tender, airy, very delicate. They are completely consistent with their archetypes.
In order to prepare it, you do not need to have the same metal mold. I specially selected the ingredients so that there would be no need for a supporting form while the cream hardened. In this connection, you can simply cut out the desired stencil from paper and use it to cut out your biscuits.
Ingredients:
200 g flour
25 g potato starch
100 ml, room temperature
3 large egg whites, room temperature
1 tsp.
175 g granulated sugar
1 tsp. baking powder
1/2 tsp. salt
43g unsalted butter, softened
Coconut cream:
400 g milk
2 cups coconut flakes
1 vanilla pod
3 yolks
130 g sugar
3 tbsp. l. flour
60g unsalted butter, softened
Chocolate coffee sponge cake:
230 g softened butter
100 g powdered sugar
12 g baking powder
50 g cocoa
1 tbsp. l. instant coffee
185 g yolks
200 g flour
100 g sugar (for proteins)
220 g proteins
a pinch of salt
45 g dark chocolate (at least 60-70% cocoa)
100 cream 33%
100 sugar
25 water
1 tbsp. l. honey
113 g butter
Decoration:
Grated dark chocolate or black confectionery sprinkles
coconut flakes
Preparation:
Preheat the oven to 180C.
Whisk together coconut milk, egg whites and vanilla extract. Beat lightly with a whisk.
In a mixing bowl, combine flour, starch, sugar, baking powder and salt. At low mixer speed, mix everything for 1-2 minutes. This way we saturate the biscuit with oxygen.
Add butter in small portions. Continue mixing at the same speed until everything is crumbly.
If you don't have a food processor, you can sift the dry ingredients through a fine sieve several times, and then rub them with your hands with the butter.
Add half of the liquid coconut mixture - mix on medium speed for 1.5-2 minutes. Add the remaining half of the milk and beat for another 30 seconds.
Finally, stir the dough with a spatula until it becomes homogeneous.
Line a baking sheet with parchment paper and place the dough on it. Level it out.
Bake in preheated oven for 20 minutes.
Remove and turn the cake over onto the prepared surface with the paper side facing up. Remove it and let the cake cool completely.
Then use a stencil to cut out the required shape. Its dimensions: length 22 cm; width: the widest part is 16 cm, the narrowest part is 2 cm; depth (just in case) 7 cm
This should result in three cake layers.
Place the biscuits on top of each other, wrap in cling film and set aside for now.
Chocolate coffee sponge cake:
Preheat the oven to 160C.
I borrowed the base of this biscuit from. To brighten the taste, I just added instant coffee, but if you are not a fan of this drink, the taste of your cake will not suffer much if you remove this ingredient from the general list.
Beat the egg whites until light foam. Gradually add sugar and continue beating until soft peaks form.
Cream softened butter and powdered sugar until fluffy and creamy.
Lightly beat the yolks with a fork until they lose their structure and become liquid. Pour them into the whipping butter in a thin stream. Keep in mind that if you add the yolks all at once, the butter may separate.
Sift together flour, cocoa, baking powder. Add instant coffee.
In several stages, alternately, add the whites to the buttery cream, gently mix from bottom to top. Then add flour and mix again until combined.
Line a baking sheet with parchment paper and place the chocolate-coffee sponge cake on it. Level with a spatula.
Bake in the preheated oven for 20-25 minutes, or until a toothpick comes out clean.
Remove the biscuit, turn it over onto the prepared surface and remove the paper. Let cool, then cut out 3 shapes using the stencil.
If you use Luca Montersino’s sponge cake for your cakes in the future, I would like to add his video master class. In the first part, a white sponge cake is prepared, which is made using a slightly different technology. (if necessary, I will translate); in the second chocolate. This amount of ingredients is designed for 2 molds of 18 cm in diameter, or for 1 standard baking sheet, like mine.
Stack the cooled and cut out biscuits on top of each other, wrap in cling film and set aside.
You will be left with a fairly decent amount of sponge “scraps” that can be used for or in a cake.
In a bowl, whisk the yolks, sugar and flour until well combined.
Pour the milk into a small, thick-bottomed saucepan and add the coconut flakes.
Clean the seeds from the vanilla bean and add them and the bean to the milk mixture. Heat the pan over medium heat, stirring, but do not bring to a boil. When the milk begins to boil, add all the whipped yolks to the milk at once. The yolks will rise to the surface.
Do not stir, let the mixture reach the point where the milk begins to boil, i.e. the milk will begin to come out between the walls of the pan and the eggs, and volcanoes will form in the center. At this point, whisk the yolks with milk until a homogeneous mass is formed, literally even less than a minute.
Remove from heat, add chopped butter and stir until melted. Then leave to cool in a cold water bath, stirring occasionally.
Coat white cakes with this cream.
Spread the remaining cream over the entire cake. Don't worry about uneven or rough surfaces because... all this will be disguised under coconut sprinkling.
Break the chocolate into pieces.
In a small saucepan, bring the cream to a boil and set aside.
In another heavy-bottomed saucepan, combine sugar, water and honey. Bring to a boil, but do not stir. The sugar should become amber in color, about 6-8 minutes. As soon as this happens, add hot cream to the caramel. Stir. Be extremely careful during this process.
Remove the pan from the heat, add the chocolate and stir with a whisk until it is completely dissolved.
Place in a cold water bath and, while cooling, stir continuously. You will feel the mixture getting thicker.
Once the chocolate caramel has cooled to room temperature, place it in a mixing bowl or food processor and beat on medium-high speed while gradually adding the softened butter. Once all the butter has been added, continue beating on high speed until fluffy and creamy.
Layer the dark sponge cake with the resulting cream, and apply the rest over its entire surface.
Refrigerate for at least 2 hours, preferably overnight, to allow both cakes to soak and set as thoroughly as possible.
Assembly:
The entire surface of the Yin cake (chocolate) sprinkle with grated chocolate. So that the chocolate does not stick together, but turns out to be beautiful shavings, put it in the freezer for 30 minutes to 1 hour. Then grate on a medium grater. Under no circumstances should you handle the shavings with your hands, they will melt immediately - either with a wide knife or a teaspoon. And apply to the entire surface of the cake. It is best to let “Yin” stand for 10-15 minutes at room temperature, then the chips will stick to its surface better.
In my case, I used chocolate confectionery sprinkles in the form of thin needles.
But, do not forget that “Yin” and “Yang” depend on each other, create constant movement, rising and falling like waves, and maintain mutual harmony. Just as a man and a woman are partners in dance, in love and in life, “Yin” and “Yang” are not only opposite, but also harmoniously complement each other. There is no absolute “Yin” or absolute “Yang”; in every phenomenon, both are necessarily present.
Therefore, we must not forget to add a piece of soft, airy coconut to our chocolate cake with sharp needles. How it's done:
Before you cover the cake with decor, cut out a circle of the desired diameter from paper. It should not be very large, but not too small either. Place it in the middle of the widest part of your cake. Then apply decor to the entire surface. Remove the circle and into this clean, creamy part, add the coconut flakes using a teaspoon.
Over the entire surface of the Yang cake ( white) Apply coconut flakes, in the same way, not forgetting to leave a circle for dark chocolate or confectionery decoration.
Assemble the cake by pressing both pieces tightly together on a serving platter.
Place in the refrigerator before serving.
Innings:
What’s good about this cake is that in one tea party you can enjoy two completely different types of cake:
Chocolate-coffee with chocolate caramel.
And coconut, with delicate custard coconut cream.
And, believe me, no one can definitely tell you which one is better. Because everyone complements each other.
Enjoy your tea!