27.08.19 23 619 44
And most importantly, how to do it
I used to be indifferent to beer, but now I brew it at home myself.
Daria Stolovitskaya
brewing beer at home
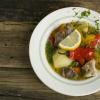
Once I tried a delicious stout, then I found out that there are many more varieties besides stout. I became interested in the intricacies of the brewing process, and as a result, my boyfriend and I cooked a batch of home beer. It took one working day for 2 boxes: 4 hours of brewing the base, 1 hour of pouring, another 3 hours of bottling. But the beer took longer to prepare: two months passed from the beginning of brewing to the first sip.
In the article I will tell you how to brew two cases of beer at home and how much it costs.
Important
Drinking too much beer is bad for your health. Minors, pregnant and lactating women should not drink alcohol at all.
Also, this post is about personal experience. If you also brew beer, tell us about the details of the process in the comments.
Homemade beer and the law
In Russia, you can brew beer for yourself without restrictions. Adults are solely responsible for their own health. If you get poisoned, there will be no one to complain to.
But only organizations that comply with the requirements of Law No. 171-FZ on regulating the production and circulation of ethyl alcohol can brew beer for sale.
Therefore, we will not sell beer, but we will brew it for ourselves. Everything is legal.
How to spend less and earn more
What beer to brew
It is unlikely that you will be able to repeat the beer recipe from your favorite brewery at home. In industrial brewing and craft breweries, all recipes are verified and classified: what types of malt, in what proportions and at what time to throw, in what barrels and at what temperature to withstand, what strain of yeast to use and what other ingredients to add.
It is almost impossible to repeat the recipe at home: you can’t get the right yeast strains, you can’t find out the correct proportions, you can’t put bulky equipment in a kopeck piece.
But something will work.
Lager or ale. Beer is divided into ale and lager depending on the temperature at which it fermented, the exposure time and the location of the yeast in the vat. Ale is darker and stronger, not as sweet and denser than lager. On average, the strength of the lager is 3-5%, ale - 4-9%, although there are also stronger varieties.
Ale is easier to brew, because it needs a temperature of 10-12 to 30 ° C, and the lager must ferment for a long time at a stable 11-12 ° C. It is difficult to create such conditions in an apartment, so we brewed ale.
Filtered or unfiltered. According to the technology, beer is filtered through a centrifuge, and not by pouring, settling and filtering. These centrifuges are expensive and take up a lot of space, so we brewed unfiltered beer.

Pasteurized or unpasteurized. Beer is pasteurized: heated to 60…70°C to keep it longer. But pasteurizing according to all the rules at home is unlikely to succeed. It's not scary: unpasteurized beer will simply cost less, but it will retain aromatic essential oils.
So, our choice is unpasteurized unfiltered ale, or rather, its subspecies - stout. As an experiment, we decided to add cinnamon. We focus on 23 liters of dark stout, which is about 40-44 bottles of half a liter. In total, for this you need to brew 26 liters of beer, because some will certainly be lost during transfusions.
What utensils do you need
Almost all brewing utensils are already in the usual kitchen, but some things will need to be bought in addition to the brewery store and the usual household one. We purchased two fermentation tanks, a mixing paddle, dextrose, a water seal, a thermometer, a faucet, a siphon extension and a capping machine. Pots, cups and glass bottles were found at home.

Tank- made of food plastic for 30 liters with handles. The future beer will ferment in it, so it is important that the plastic is food-grade - construction or garbage will not work. Ordinary plastic will spoil the taste. Tanks are sold in shops for home brewing, household and markets. It costs about 450 R.
Tap needed to drain the finished beer from the tank. The tap is cut 2 centimeters above the bottom of the tank so that the yeast does not get into the bottles. This operation can be done independently, or you can ask the seller - usually taps and tanks are sold in one place. The average price per tap is 250 R.


thermal sticker shows the temperature inside the tank. Too high or too low a temperature will kill the yeast. If the yeast dies, it will stop eating sugar and no beer will come out. It is necessary to keep the temperature not lower than 10…12 °C and not higher than 30 °C and store the tank away from the sun.
Stickers are sold in pet stores, in aquarium departments. You need to glue the thermometer on the tank in the same way as on the aquarium - on the outside. The price is about 200 R.
Water seal. During fermentation, carbon dioxide is released in the tank. It accumulates in a closed fermentation tank. Due to the large amount of gas, the pressure will increase and the gas will escape at the joints, for example through a loose cover or valve gasket. Therefore, the gas must be removed, but it must be done in such a way that oxygen does not get inside and does not spoil the fermentation process. For this, a water seal is needed: it removes excess carbon dioxide and does not let oxygen into the vat.
4840 R
I spent on brewing utensils
I use a special water seal from the brew store for 250 R, although just a hose dipped into a can of water will do.
Width="495" height="667" class="" style="max-width: 495px; height: auto"> Thermal sticker costs 200 R width="495" height="667" class="" style="max -width: 495px; height: auto"> Water seal with lid - 250 Р
Lid for a vat with a connector for a water seal. The water seal is held on the lid of the tub. I made a hole for the water seal in the store along with the tap. The whole operation cost 30 R.
The hole does not have to be located strictly in the center, the main thing is that it should be in principle and there should be a water seal in it.
Disinfectant - deo-chlorine. You can disinfect dishes and vats with any disinfectant that is suitable for food utensils. We love deo-chlorine, it rinses off easily and leaves no aftertaste, which is not the case with dish detergents. Price - from 15 R for one tablet.


Thermometer needed so as not to pour the yeast into a solution that is too hot and not pour boiling water over them. An ordinary food thermometer is suitable, which measures the temperature of meat or wine. They are sold in hardware stores or hypermarkets for 500 rubles.
Siphon extension needed to bottle beer, starting from the bottom, and keep out excess oxygen. In addition, with it, beer will not lose carbon dioxide during transfusion. They are also sold in shops for brewers, they cost up to 300 R.


Spatula for mixing. One of the few specialized things in the arsenal of a young brewer. This is a spatula made of durable plastic, which will mix 30 liters of dense sweet liquid without any problems, will not break or bend. An ordinary kitchen spatula will not cope with a dense brew. A flimsy wooden spatula will not work either: if it breaks in the vat, the chips will fall into the beer.
Such a blade costs about 350 R.

Bottles and corks to cap and store beer. It is better to take dark glass bottles. It doesn't give off the extra aftertaste that can come from a plastic bottle, and the dark color protects the beer from light.
It is better to cork bottles with crown caps. They must be new: used corks cannot be hermetically sealed. Corks and bottles can be bought in specialized beer stores or ordered online. Set "bottle + cork" will cost 20 R.

Crown caps look like this. Regular corks, as on all glass beer bottles

Capping machine. If you will be using glass bottles and crown caps, you will need a capper. Just don't put corks on bottles.
Capping machines are manual and semi-automatic. For the first time, you can buy a manual machine in a special beer store: it costs from 600 R, and semi-automatic - from 3000 R.
 width="495" height="667" class="" style="max-width: 495px; height: auto"> This is a bottle with a yoke cap. For such a capping machine is not needed, but it is unlikely that it will be possible to save money: a bottle with a yoke cork is more expensive than with a crown cork - 60 R
Spice bag. We brew unfiltered beer, but that doesn't mean it has to be contaminated with spices. In order not to strain the beer through cheesecloth and not to catch cinnamon sticks all over the vat, we use a laundry net. It costs from 90 R.
Wort pot 5 l. Wort is the basis for beer, an unfermented mixture of sugars. Any household pan will do, the material does not matter. The volume is chosen according to the amount of ingredients that need to be poured there, so it can vary from batch to batch.
Width="495" height="667" class="" style="max-width: 495px; height: auto"> Spices in a bag. Such packages are sold in large hardware stores and hypermarkets, in sections for washing things. Cost from 90 R 


Small ladle for 50-70 ml. A large one will do, but small ones are more convenient to stir the malt extract in a jar.
Tea and table spoons. Beer shops sell special measuring spoons, but a canteen will do.
Small bowl. Glass, ceramic or stainless steel. No need to buy it specifically, use any.
Cup with lid. It can be any container where you can fill the yeast with water. Better ceramic or glass. We have a 200 ml ceramic cup. The lid is needed to close the cup of yeast from dust particles and any external influences. Anything larger than a cup will do. We have a food container lid.
Small saucepan. We will heat the malt extract in it to pour it out of the jar - it is too thick when it is cold. A small saucepan, saucepan, steam bath Anything that will fit a tin can.
The cost of utensils for brewing - 4840 R
| Spending | Price | Where did you buy |
|---|---|---|
| capping machine | 1500 R | Shop for brewers |
| 980 R | Shop for brewers | |
| 450 R | ||
| 390 R | Shop for brewers | |
| 350 R | Shop for brewers | |
| food thermometer | 350 R | Hypermarket or hardware store |
| Plastic water seal | 250 R | Shop for brewers |
| 250 R | ||
| 200 R | Hardware store, pet store, hypermarket | |
| Deo-chlor tablets, 5 pcs. | 70 R | Shop for brewers or household |
| Crown cap, 50 pcs. | 50 R | Shop for brewers |
| 0 R | Free in the kitchen |
capping machine
Price
1500 R
Where did you buy
Shop for brewers
Glass bottles, 0.5 l, 50 pcs.
Price
980 R
Where did you buy
Shop for brewers
Food grade plastic container with lid
Price
450 R
Where did you buy
Shop for brewers or household
Siphon extension for bottling
Price
390 R
Where did you buy
Shop for brewers
Spatula for mixing beer
Price
350 R
Where did you buy
Shop for brewers
food thermometer
Price
350 R
Where did you buy
Hypermarket or hardware store
Plastic water seal
Price
250 R
Where did you buy
Shop for brewers
Food grade plastic faucet and gaskets
Price
250 R
Where did you buy
Shop for brewers or household
Tape thermometer in the form of a sticker
Price
200 R
Where did you buy
Hardware store, pet store, hypermarket
Deo-chlor tablets, 5 pcs.
Price
70 R
Where did you buy
Shop for brewers or household
Crown cap, 50 pcs.
Price
70 R
Where did you buy
Shop for brewers
Ladle, cup, ladle, spoons, pan, bowl
Price
0 R
Where did you buy
Free in the kitchen
In the table, I indicated the average prices for August 2019. We bought dishes a few years ago - then everything was a little, but cheaper.
Ingredients
Most beer ingredients can be purchased from specialty brewing shops. For spices and water, you will have to go to the grocery store.
The cost of ingredients is easier to determine by budget: estimate the amount you are willing to spend and buy everything within this range. In the article, the amount of ingredients is calculated for 23 liters of beer.
Understanding malt, hops and yeast takes years of practice. I recommend the first time just ask the consultant what is good for X rubles. Most importantly, make sure all ingredients are fresh. With experience, favorite companies, discount cards and familiar sellers will appear.
Here are the ingredients you need to buy.
Hopped malt extract, 1.7 l. To brew beer, you need malt and hops - this is the basis. The malt is crushed, then boiled, then hops are added at a certain time. This is a difficult process for a beginner, so for the first time, you can take ready-made extracts. Add the extract to the water - and you're done.
You can determine the total batch size by following the instructions on the hopped can. malt extract. It says how many liters of beer it is designed for. We bought a 23 liter can for 1350 R.
Unhopped malt extract, 2 l. The yeast needs sugar to ferment, but we use unhopped malt extract instead for a fuller flavor. But you can also brew beer with sugar syrup.
Dextrose, 300 g In addition to the extract, take dextrose. While regular sugar can contain impurities that will affect the taste of beer, dextrose does not.
Width="495" height="667" class="" style="max-width: 495px; height: auto"> 4 liters of unhopped malt extract costs R670. We need about half width="495" height="667" class="" style="max-width: 495px; height: auto"> Half a kilo of dextrose cost 81 R
Yeast, 10 g Ordinary yeast for dough will not work - you need special beer and always fresh. They will eat sugar and produce gas to ferment beer. You can buy yeast separately, or you can use the one that comes with the can of malt extract.
Drinking water. We take water in canisters of 5 liters. It is better to choose filtered, because the taste of beer on tap water is unpredictable.
2720 R
I spent on beer ingredients
Spices- 4 packs of cinnamon sticks. I don't know what will happen: either there will be light cinnamon notes, or there will be no effect at all. This is an experiment.
Width="808" height="808" class=" outline-bordered" style="max-width: 808px; height: auto" data-bordered="true"> A bag of yeast costs 150 R
Spent on ingredients - 2720 R
Hopped malt, 1.7 l
Price
1350 R
Where can I buy
beer shop
Unhopped malt, 4 l
Price
670 R
Where can I buy
beer shop
Drinking water, 4 canisters of 5 liters
Price
269 R
Where can I buy
Grocery store
Cinnamon sticks, 4 packs
Price
200 R
Where can I buy
Grocery store
To get rid of extraneous bacteria, you need to disinfect all the dishes. It is better to do this in the same room where you will cook, so as not to once again carry pots and not catch bacteria along the way.
For a tank of 30 liters and all dishes, you will need 15 liters of disinfectant solution - these are 3 tablets of deo-chlorine, dissolved in water. Pour the solution into the tank, wash all the dishes in the tank, pour the solution from the tank through the tap. Then rinse the dishes with running water to remove the deo-chlorine.
Disinfected dishes should be placed on clean table. It is better to pre-wash it with a cloth soaked in a solution of deo-chlorine. I recommend working with deo-chlorine in rubber gloves - just in case.

We brew beer
We are preparing the base. Warm the jar of hopped malt in a pot of hot water to make it flow better. Pour 2 liters of unhopped and 1 liter of hopped malt extract into a five liter saucepan and add water, leaving 2-3 cm to the edge of the saucepan. Put some dextrose in there. We took 300 g per 30-liter vat. The resulting mixture must be heated and stirred so that it becomes homogeneous, but do not bring to a boil. Pour into a fermentation tank.
Add the remaining 0.7 liters of hopped malt extract from the can to the fermentation tank. Add water there to make 26 liters, mix everything thoroughly. In case the sugar from the unhopped malt was too hard to break down, we added another 300 grams of dextrose to the vat. Once again, mix thoroughly until smooth.

We revive the yeast. Typically, a jar of malt sugar comes with yeast. You can use them, or you can buy others. It all depends on the desire to experiment. We liked the BeerVingem yeast, it performed well in the last batch.
Yeast in packages "sleep": they do not eat sugar and do not give out a reaction. To wake them up, you need to fill them with warm water. The water temperature should be 24 ... 26 ° C, but not higher than 28 ° C. Pour 10 grams of yeast with a glass of warm water and leave for 15 minutes in a cup. We cover the cup with a lid so that dust and bacteria do not get into the yeast.
Mix wort and yeast in a vat. We measure the temperature in the tank. It should be no higher than 27 ° Cso that the yeast does not die. Pour the yeast into a vat, stir, throw a bag of spices, close the lid. The base for beer is ready.
The tank with the future beer must be placed on a raised platform in order to easily pour the beer from the tap and not disturb the yeast at the bottom once again.

We install a water seal. Without a water seal, bacteria will enter the tank, and excess gas will not come out. If the water seal was not installed by the seller of the tank, you will have to do it yourself.
How to install a water seal:
- Take the vat of beer to where it will stand for the next 1-2 months and gurgle. Better not to the bedroom: gurgles very loudly. We placed it in the living room.
- Insert the water seal into the lid of the tub. Close the vat with a lid.
- Pour plain cold water into the water seal up to the mark, it can be unfiltered.
- Close the water trap with a lid so that dust does not get in and the water does not evaporate.

We check that the beer has begun to ferment. If everything went well, the yeast will begin to ferment within a couple of hours. This is easy to check: the water seal will gurgle. The peak of bubbling will be on the fourth or fifth day, the beer will gurgle 3-4 times per minute. I recommend closing the doors to the room where the vat of beer lives, it's really loud.
We pour beer. Yeast will gradually eat up sugar and release less and less carbon dioxide. Some of the yeast will overeat, die and settle to the bottom. To remove dead yeast from beer, it is poured from container to container, as compote is poured, getting rid of sediment.
When the beer gurgles every 6-7 minutes, it's time to pour it to remove excess yeast. We poured the beer in the fifth week because we couldn’t before - there was no time, but usually they do it in the third or fourth week.
How to pour beer:
- Disinfect a suitable container, such as a second tank or several pots.
- Pour the beer from the vat through the faucet. Do not pour it over the edge, so as not to raise the yeast from the bottom.
- Drain the cloudy dead yeast mixture from the main tank, rinse and sanitize it. About three to four liters of liquid will be lost - keep this in mind when planning the total volume of the batch.
- Pour the beer back into the vat, close the lid, put a water seal.
After pouring, place the tank on a raised platform so that it is convenient to bottle the beer without dragging the tank and raising the remaining yeast. Leave the beer for another 3-4 weeks before bottling.
We bottle. Of the 26 liters in the vat, 22-23 liters of dark stout will remain. It seems like there is too much of it, but in fact it is a little more than 2 boxes. A couple of times to go to barbecue with the company - and the beer will end.
It is better to bottle beer using a siphon tube with an extension cord: it will fill the bottle starting from the bottom and exclude prolonged contact of beer with air. The less it is in the air, the longer it will stand and not deteriorate.


Sending for storage
It is better to store beer in a dark, cool place. Not necessarily in the refrigerator, but not in the sun and not near the battery. Heat and light will damage the beer, even when it is closed in bottles - the drink will turn sour. We store beer in the second fridge in the living room.
The shelf life of homemade beer is up to a year, but it is better to drink it earlier. Even after pouring, yeast particles will remain in it, and the taste will gradually change.
What can go wrong
It is not difficult to brew beer, but if you make a mistake in the recipe or break ground rules, then you can ruin the whole batch. I share my personal experience.
Bacteria got into the vat. If you carelessly wash the dishes and work in a dusty room, bacteria will get into the tank along with the yeast and wort, which will make the taste unpredictable: maybe it will turn out cool, or maybe sour or too bitter. You never know how the reaction will go.
old yeast they don’t eat the right amount of sugar, and the beer will turn out to be liquid, empty. If the yeast is old, the beer will rarely gurgle in the first week of fermentation - less than once every 5-6 minutes. It can't be fixed, you'll have to throw everything out. Buy yeast from specialty stores and check the expiration date.
Yeast is low on sugar. The yeast will quickly eat up all the sugar before the beer is ready. If it gurgled normally for the first week, and then slowed down sharply, then the yeast had time to eat all the sugar. You can add more dextrose to the vat, but you need to do this quickly and only from clean dishes - this is important.
Too much or too little spices. This cannot be prevented - you will only know about it after bottling. Home brewing is always an experiment, you need to be prepared for an unexpected taste.
How much is a liter of homemade beer
I figured out how much it costs to brew 23 liters of homemade unfiltered ale if you need to buy everything for the first batch.
59 R
worth a bottle of our dark cinnamon stout
23 liters of beer will cost 7560 R: 4840 R - for dishes, 2720 R - for ingredients. It turns out 164 R for 0.5 liters. It seems to be expensive, but next batches will be cheaper as the equipment is reusable.
The beer was cheaper for us, because we did not buy bottles, deo-chlorine and equipment - everything was left from the last brew. 2720 R was spent on ingredients and crown caps: a bottle of dark cinnamon stout cost 59 R.
Remember
- It is impossible to brew beer for sale at home.
- You will not be able to repeat your favorite sort of purchased beer at home.
- Extraneous bacteria are the main enemy of beer, everything must be thoroughly disinfected.
- The result of home brewing is always unpredictable. This is creativity and experimentation.
Do you want your first beer to be tasty, foamy and aromatic?
Then read this article. In it, we will tell you in an accessible way about the main stages of making beer, we will give a few useful tips on its preparation at home, and at the end we will give a few simple recipes.
Perhaps they will open the way for you to the fascinating world of home brewing!
Stage 1. Selection and preparation of malt

- Wort kettle/bulk pot
- Malt
- Crusher
Malt is where brewing starts. In fact, malt is a grain germinated in a special way:
- barley;
- rye;
- wheat.
You can make your own malt, or you can buy ready-made malt. For beginners, I would recommend purchasing a ready-made one - it is much faster and easier.
Malt is basic and special. For creating own recipe with a unique aroma and taste, a combination of these species in different proportions is usually used.
Then the finished malt grinds And overwritten. For crushing, it is best to use a stone mill or a special grinder. They are able to perform the correct grinding without damaging the shells, which is very important for the high-quality extraction of useful substances.
Mashing- a process when malt is placed in a mash kettle, mixed with water (in a ratio of 4 to 1), heated to a temperature of 40-80 ° C and left for about 2-3 hours. During this time, the enzymes contained in the malt break down the starch into sugars. They are destined to become beer in the future.
Stage 2. Filtering

Required Equipment and Ingredients
- overflow siphon
- Stirring paddle (optional)
At this stage, it is required to separate the wort from the malt grains as efficiently as possible. If you used a dedicated wort kettle or brewery for mashing, there will be no problems with draining. If used a regular saucepan, it is better to stock up on an overflow siphon in advance.
The drain process itself is divided into 3 stages:
- mash out;
- recycling;
- washing.
Mash out- a stage that stops the processes of splitting starches. The wort is heated to a temperature of 78°C, due to which all the sugars are kept intact in the wort, and the consistency itself becomes more liquid.
Then carried out wort recycling, as a result of which a filter layer is formed, which contributes to the natural separation of the wort from grain particles and other impurities.
Washing- the last stage, in which the filtered grains are washed again with warm water. It is made to maximize the extraction of sugars.
Stage 3. Brewing the wort

Required Equipment and Ingredients
- Hop
- chiller
To disinfect the wort, it must be boiled. Usually the whole process lasts no more than 1.5-2 hours. During the boil, the wort is hopped, i.e. hops are added to it.
Hopping is necessary in order to give the future beer the necessary taste, bitterness and aroma. The final characteristics depend on the moment of bookmarking. If you add hops at the beginning of the boil, the beer will be more bitter: the longer the hops are boiled, the more bitterness. To give a brighter taste, hops are laid in the middle of the boil, to enhance the taste and aroma - at the end.
An important step is the rapid cooling of the wort at the end of the boil. Speed is very important, as pathogenic bacteria can enter the wort and spoil the entire drink. Faster chilling speed means less chance of contaminating the wort.
Stage 4. Fermentation of the wort

Required Equipment and Ingredients
- Fermentation tank
After boiling, the wort is poured into a pre-disinfected fermentation tank and yeast is added. The fermentation stage begins - the conversion of sugars into alcohol. Depending on the type of yeast you use, you end up with ale or lager.
Fermentation lasts an average of 10-14 days. The average fermentation temperature is 15-20°C for ales and 10°C for lagers.
Stage 5. Bottling for carbonization

Required Equipment and Ingredients
- PET bottles
- Glucose
Fermented wort must be bottled and carbonized - saturated with carbon dioxide. There are 2 ways of carbonization - forced and natural.
More simple - the second. Glucose (6-9 g per 1 liter) is poured into a bottled foamy drink and tightly twisted. Carbonization lasts approximately 1 month on average. At the end of the period, the beer is completely ready for drinking.
Popular simple beer recipes at home
There are a lot of recipes for making beer. Many brewers end up inventing their own unique recipes by blending malt and adding hops in their own proportions.
But the first beer is best prepared according to proven methods. There are 2 options for the path: simple and very simple.
Simple - make a one-shot beer. It only takes one pause to mash the malt.
Very simple - make beer from malt extract. In this case, the manufacturer has done most of the work for you by preparing a ready-made concentrated mixture. You only need to boil it and send it to ferment.
Conclusion
I hope this information will help you figure out how homemade beer is made. In fact, cooking is not as difficult as many people think. And if you join the process gradually, with simpler recipes, you won’t even notice how in a couple of months you will become a strong connoisseur of home beer. And there is already close to the master.
Some store-bought beer is not to their liking. They like to brew beer at home. Companies and enterprises are engaged in brewing. On the shelves of stores there is a wide range of brands and varieties. People love this drink.
Beer is a low-alcohol drink with a bitter aftertaste and hop aroma. This is the first drink created by alcoholic fermentation. The ancient Sumerians, who lived 9,000 years ago, brewed a drink from barley malt. According to the assumptions, the predecessor appeared in the Stone Age. In those days, people made it by fermenting cereals.
Today, home brewing is popular, because a home-made drink tastes better than a store-bought one.
I'll tell you about the intricacies of cooking at home. Guided by the advice, you will prepare a treat in the kitchen. The main thing to take necessary ingredients: brewer's yeast, malt, hops and water.
Some people buy specialty hops, I use homemade ones. In my country house, “female” hops grow, which I collect and harvest. Hops ripen in August. The collected raw materials are dried and crushed.
Malt is germinated grains of wheat, barley or rye. I use barley. I brew beer from grain or malt extract. Growing malt is not easy, I buy it in the store.
Video tips
How to make beer from bread
European monks began brewing beer in the 12th century. Later, their Russian counterparts borrowed the cooking technology. For a long time in our country, home brewing was prohibited, but with the advent of democracy, everyone has such an opportunity.
I will consider two time-tested methods for making homemade beer, and you, having chosen a convenient option, will prepare a wonderful nectar.
Cooking is divided into 3 stages: boiling, fermentation and ripening.
You can buy a microbrewery and special beer wort to simplify the brewing process.
Ingredients
Servings: 10
- sugar 200 g
- malt 400 g
- crackers 800 g
- hop 200 g
- yeast 35 g
- water 13 l
- peppercorns to taste
per serving
Calories: 45 kcal
Proteins: 0.6 g
Fats: 0 g
Carbohydrates: 3.8 g
4 o'clock 30 min. Video recipe Print
In a large bowl I mix 100 grams of sugar, 400 grams of malt and twice as much rich crackers.
I pour boiling water over two hundred grams of dry hops and add a few peppercorns.
I breed 35 grams of yeast in 6 liters of heated water and add a mixture of pepper and hops. I mix.
I leave the container with the resulting slurry in a warm room for a day. I do not cover with a lid. Then I add 100 grams of sugar and pour in 4 liters of heated water.
I put the dishes on a small fire and cook for 4 hours. Should not boil.
I repeat the next day. After I drain the liquid, add 3 liters of boiled water to the gruel.
After 60 minutes, drain the liquid again and add to the first broth. Then I boil the wort, remove the foam and filter.
I bottle and seal tightly. Two weeks of aging in a cool place and homemade beer is ready.
Classic recipe
To brew beer, you will need a capacious vessel for the wort, a fermentation tank, a thermometer, a water dispenser, a wooden spoon, a siphon tube and, of course, bottles with corks.
Cooking:
- I pour three liters of water into the pan, add a kilogram of sugar, mix and bring to a boil. I place the container with malt extract in heated water for 15 minutes.
- At the end of the procedure, I pour the malt extract into the fermentation vessel and sugar syrup. I mix.
- I pour 20 liters of pre-filtered water into the same vessel. The main thing is that the temperature of the solution is suitable for fermentation. It's 20 degrees.
- I add yeast. The procedure is very responsible, the quality of the homemade drink depends on the quality of the fermentation of the wort. Brewer's yeast is sold along with malt extract.
- I pour the yeast into the container with the wort evenly and as quickly as possible. The future drink is not recommended to be in contact with air for a long time.
- I tightly close the lid of the fermentation dish so that air does not get inside. After I install a water dispenser - a rubber stopper that closes the hole in the lid. I pour chilled boiled water into the device.
- I move the closed vessel to a dark room with a temperature of 20 degrees. I stand the must for a week. During fermentation, do not open the lid.
- After the specified time, I bottle it and add hops - a natural flavor. I put a few hop cones in each bottle, and only after that I fill the bottles.
- I add sugar to each bottle at the rate of two teaspoons per liter. After the bottle, I cork, shake and leave in a cool place for 14 days to ripen.
- After this period, the homemade foamy drink is suitable for consumption.
If you are tired of store-bought beer or do not trust modern producers, use my recipe. By the way, you can present a glass of homemade beer to guests as a New Year's gift.
Hop beer recipe
The taste of homemade beer will surprise you, because it differs from the store-bought beer; homemade beer has a different level of quality.
Ingredients:
- yeast - 50 gr.
- boiling water - 10 liters
- dry hops - 100 gr.
- sugar - 600 gr.
- molasses - 200 gr.
- some flour
Cooking:
- I grind the hops with flour and sugar.
- I pour the resulting mixture into a bowl with 10 liters of boiling water, mix and insist for three hours.
- I filter the liquid and pour it into a barrel. Here I add yeast with molasses and mix.
- I leave to wander. No more than three days.
- After I pour it into clean bottles and cork.
- It remains to send the beer to a cold place for one week to ripen.
Homemade instant beer
Ingredients:
- malt - 200 gr.
- hops - 200 gr.
- yeast - 35 gr.
- water - 10 liters
Cooking:
- I mix two hundred grams of grated hops with the same amount of ground malt. I pour the resulting mixture into a linen bag.
- Through the bag into a large container, pour boiling water in a thin stream. I mix the thick in the bag, filter and cool 10 liters of the solution. Loading...
I bring to your attention an interesting instruction on how you can easily brew delicious beer at home, which will definitely appeal to all your friends. Be sure to read on!
Equipment.
The first thing you need is a saucepan or a tank of 40 liters. You can enameled, you can use stainless steel. Stainless steel is better, but more expensive. Enameled container is also nothing, but three times cheaper. I bought this miracle for 2000 rubles. I just found it, by the way. For home use, pots can be dispensed with when cooking up to 50 liters. Then you need to buy more serious equipment, since it is difficult and dangerous to carry 50 liters of boiling water with your hands.

According to the degree of hardcore, home brewing can be divided into two types: concentrate and all-grain (grain).
In the first case, we have the wort ready, in the form of an evaporated concentrate. It's not chemistry. This is what neither is a natural product. Now the choice of concentrates is very large, you can pick up something for every taste. They cost around 800 rubles for a can of 20 liters of finished beer.
In the second, we buy malt and mock it ourselves. There are, however, absolutely perfectionists, they themselves make malt from barley and prepare water, achieving the necessary mineralization. Well, for example, if some beer is brewed in the English village of Fuckthishole, then the mineral composition of the local water is found out and the same is made. This is over 80 level house. brewing. For lovers, it is enough to buy good water in a store or draw from a nearby well / spring / tap.
Next, you need to turn a banal pan into a wort mash. You can use two containers, one for mashing, the second for cooking, but in an apartment, the less bulky rubbish, the less the wife swears. Which is important for a brewer. We go to the nearest construction market and buy the necessary parts:

1. Half inch brass clamp, plus two locknuts, plus two silicone gaskets, plus two PTFE gaskets.
2. Ball valve with female thread also ½ inch.
3. American for soldering with a copper tube.
4. Elbow.
5. Three copper tees with a diameter of 15mm.
6. Four corners 15 mm.
7. Two meters of unannealed copper tube.
We drill a hole in the pan as low as possible (here, who has what kind of tool and hand-to-hand skill), trying to minimally damage the enamel, and assemble this design:

We first put a silicone gasket to the wall of the pan, and a fluoroplastic gasket on it. Otherwise, the nuts will seize the silicone.
Well, now the wort maker is ready. Now let's upgrade it to the mash. Here it is necessary to delve a little into the theory.
Mashing is the process of keeping the mash (water + malt) at a certain temperature. This holding is called a temperature pause. During this time, the enzymes in the malt break down the starch, which is a polysaccharide, into simpler sugars that the yeast can eat. The enzymes involved in this process are the so-called alpha and beta-amylases. According to the figurative expression of one of our colleagues, if we imagine starch as a tree, then beta-amylases bite small twigs (fermentable sugars), reach the fork of the branch and freeze, and alpha cuts randomly into arbitrary pieces (non-fermentable sugars). The thing is that these enzymes are most active when different temperature. Beta-amylase at 60-65 degrees, alpha - at 70-75. Accordingly, if we let the beta work longer, we will get a wort of maximum fermentability, a high amount of alcohol, but an empty taste, because the yeast will turn all the sugars into alcohol and water. On the contrary, if alpha-amylases rule, then the beer will be dense, rich, but very light, because there will be practically nothing for yeast to eat there. By combining temperature pauses and achieve the desired balance between the body of beer and alcohol. Here, the theory is rough.
To turn our tank into a mash we need to assemble a filter element. This, unfortunately, requires some manual work.
To begin with, we take an American, a tee, a piece of copper tube and solder one to the other.

Soldering copper pipes is easy. You need solder, always lead-free, and flux. All this is freely sold in the markets or in plumbing stores. Solder look Sn97-Cu3. Without flux, soldering will not work, the solder will stupidly drain from the copper. If there is a gas burner for soldering, it’s good, if not, it will do. gas stove. We clean the surfaces, apply the flux in a thin layer, put everything together and heat it up. When small droplets of tin appear on the parts smeared with flux, we bring the solder wire to the joint and the tin itself will be drawn into it under the action of capillary forces. Cool down and voila. Just remember, copper has exceptional thermal conductivity, work only with a tool, otherwise a severe burn is guaranteed. Copper cannot be thrown from hand to hand like an ember, even a short touch is a burn.

We fasten the resulting horseradish to the drive and determine the length of the tubes to the walls of the pan. The filter must be in place.

So, we are gradually assembling such a structure.

In the tubes with a hacksaw we make cuts a third of the diameter and about a millimeter wide. We do not solder the tubes in two places, we leave them collapsible so that the filter can be washed.
Together:

Here is such a shaitan device.
The last thing you need a hand-ass for is a cooler, or, as it is called, a chiller. Again we go to the market and buy 10-12 meters of annealed copper tube with a diameter of 10-12 mm and several meters (depending on how far the brewing will be from the connection point to cold water) of any hose, plus a couple of clamps. The annealed tube, in contrast, is easily bent by hand. So we bend, winding on something that is suitable in diameter. Then, carefully, with a large radius, so as not to break, we bring the end up. For rigidity, you can solder the coils to the vertical tubes, but I just wound it with copper wire (there should be an “ass” in the hand-ass).

Now let's move on to what is problematic to do yourself.

1. Hydrometer AC-3. This garbage is needed to measure the density of the wort. You can do without it, but it's better with it. Many use refractometers for this, but I myself have not used them, I will not say anything.
2. Fermentation tank. Now many online stores offer such 32-liter barrels with a water seal (4) and a faucet (5) at once. Also with a scale and a glued liquid crystal thermometer. You can buy it this way, or you can buy it separately. But, if in brewing shops this tank costs 300 - 350 rubles, then in offices selling plastic containers, it also costs 160 rubles. A matter of taste and laziness.
3. Mill for malt. Specifically, this one is called Comfort-500, made at the state farm named after the 47th anniversary of Mao, it looks scary, metal processing is at the level of the Stone Age, but it costs one and a half thousand and performs its function. The same, but made in Belgium costs already 3.500. Advanced two- or three-roll mills already cost from 5 to 9 thousand. No coffee grinders, meat grinders and blenders will work. I'll explain why a little later. A rolling pin will come up, but it will not be grinding, but the punishment of God and the seven plagues of the Egyptians.
4. ---
5. ---
6. Accurate digital thermometer with remote probe. Accurate at least within a degree. The thing is absolutely necessary. The one in the picture, I foolishly bought for 1500 rubles. Then it turned out that it was possible to buy a good Chinese thermometer for 300 rubles. On Avito.
7. Scales. It also needs to be more or less accurate. If within a gram, then perfect. In the picture Energy-403, weigh up to 5 kg, there is a tare function. Accuracy - grams. Well, that's how it's written.
The last thing we need is a meter and a half two SILICONE hose under the fitting on the pan. I did not draw it, a hose and a hose, such a transparent one. It is needed to drain the hot wort. PVC will not work, it stinks when heated and emits all sorts of muck from itself. We need a medical silicone hose suitable for sterilization. Where to get it - depends only on your imagination.
Actually everything. A microbrewery for the home, for the family, is ready. There are still all sorts of small things that make the process easier, but at first you can do without. The budget for all this mess ranges from 10 to 15 thousand. Depending on the.
Now, let's move on to the actual brewing of beer. I just want to clarify right away that in addition to equipment and ingredients, you will also need a lot of patience. The brewing process itself takes 6-8 hours, fermentation from 7 to 14 days, exposure from a couple of weeks to a year. That is, even in simple case you will try your first one not earlier than a month after cooking. But believe me, it's worth it.
And another important point. The room in which all this demonism takes place must be clean. No mold in the corners, no fermented milk products around. No animals. Wort is a super-nutrient medium for fungi and bacteria. Therefore, the cleaner the room, the less chance of beer contamination. I will write about the disinfection of equipment later.
So, we will cook the Black Rhinoceros. This recipe, being clearly in a state of enlightenment, was invented by a friend from one club house. brewers with the nickname Rhinoceros. Dark beer. Therefore, black.
We will need, based on 28 liters of finished beer (we are limited to a 32-liter fermenter):
Munich malt, Munich, with color EBC 25 (there will be “Munich-25” in stores) - 5.77 kg.
Melanoidin malt, Melano, EBC 80 - 0.87 kg.
Caramel malt, Cara, EBC 50 (you can Cara-150, it will be darker and richer) - 0.35 kg.
Traditional hops, also known as Traditional - 20 grams.
Hops Saaz or Saaz - 40 grams.
Yeast Fermentis Safale S-04 - one sachet about 11 grams.
First things first, the malt must be ground. We get our hellish mill and forward. You can twist it with your hands, you can attach a screwdriver, I acted more cunningly and plowed my small one. Six kilos of malt will require half an hour of time with smoke breaks.

The trick of grinding malt is that it is necessary to obtain not flour, but grains crushed into several parts and at the same time undamaged shells. That's why no coffee grinders are suitable. These shells, settling on the bottom of the mash, form a filter layer through which the wort is actually filtered. And it flows out through our filter system of copper pipes. The cuts are small enough for the husks to slip through, but large enough for filtering to take a reasonable amount of time. Without this husk, the grains will quickly clog the slots and the wort will be filtered before the onset of democracy in North Korea. This is what ground malt looks like:

This recipe uses a single mash at 72 degrees. Above, I talked about how temperature affects congestion. So this beer should turn out to be “full-bodied” with a small amount of alcohol. We put a filter in the tank, take four times more water (24 liters) relative to the amount of malt and heat it up to 78 degrees, when adding malt, the temperature will drop to the 72 we need. By the way, a degree there, a degree here is not fatal. But at more than 75, enzyme activity drops sharply. Overheat ninada.

Heated - we fall asleep malt, mix. (photographed on Comfort-500, the quality is comparable). We measure the temperature.
Should be 72 degrees.

We close the lid and wrap the tank in a blanket / padded jacket as tightly as possible.

We are waiting for an hour and a half. 1 hour, 30 minutes. Patience... Patience...
While the malt is mashing, prepare the yeast. Yeast is dry and needs to be rehydrated.
We take a jar, a flask or something similar, sterilize it in boiling water and pour about 250 ml of boiled water into it. The water temperature is 20-24 degrees. We fall asleep there yeast from a bag and plug the neck with cotton wool. Nutrients are added to the composition of dry yeast for the first time, so you can get by with just water. They will start wandering there in half an hour.
An hour and a half has passed. Now we need to conduct the so-called "iodine test". We take a bit of wort with a spoon and drip iodine there. If the color has not changed, then there is no more starch in the mash, everything is split into sugars. And this is gud. If it turns blue, it's not good at all. You can still try to hold the wort under the covers, but most likely this will no longer help. Although I have yet to see a quality imported malt turn blue after mashing on an iodine test.
Now it's time for the mystical process aptly called mash-out. We put the tank on the stove and stirring constantly - because it burns, we bring the temperature of the mash to 78 degrees. Turn off the heat and soak again under the covers for 15 minutes. This is necessary to stop the activity of enzymes. The breakdown of starch stops.
During these 15 minutes, we prepare water for washing. This is such a special water, which differs from ordinary water only in that it is heated to 80 degrees. When we drain the primary wort, a lot of sugars will remain in the spent grains. It is not good to throw away a good thing, so we will try to wash them out of there.
It's time to filter the congestion. We put a silicone hose on the fitting, drag our plastic fermenter and open the tap.

What is the hose for? The thing is that hot wort actively oxidizes when it comes into contact with air. And this gives an extraneous aftertaste in beer. To minimize contact with air, a hose is needed.
At first, the wort will go very cloudy - the husk has not yet settled properly to the bottom, so we return the first drained liters back. There is a subtlety here - it is important for us that a filter layer is formed, but pouring the wort back into the tank, we stir up the sediment again. Whatever it was, we put a large plate on top, let it sink, but everything will now pour on it and not disturb the pellet.
We drain slowly. As soon as the pure wort has gone, we stop returning it to the mash and begin to collect it in the fermenter.

At the same time, we make sure that the grain is not exposed. As soon as it appears, add flushing water. So, gradually, pouring and topping up, we need to collect 30-32 liters of wort. At the end, we stop pouring the washing water and simply drain everything that is. The first part of the Marleson ballet is completed. We throw out the grain, unscrew the filter, rinse the tank and pour the clean filtered wort into it. And let it boil. It will take a long time to heat up 30 liters, you can speed it up by covering it with a lid. But keep in mind, if you miss the moment of boiling, the wort will run away, and washing the stove from burnt sugar is hell and Israel. You will also hear from your wife a lot of interesting things about yourself, about beer and about the universe as a whole.
As soon as it boils, we weigh 20 grams of traditional hops and throw it in there. These are hops for bitterness. We detect 50 minutes, let it boil. In total, we need to cook for 90 minutes or an hour and a half. During this time, about 3-4 liters will boil away, any unnecessary will evaporate with steam, some of the sugars will caramelize and the walls of the room will be covered with drops of condensate.

Thoroughly wash the fermenter, fill it with water and pour a vial of 5% pharmacy iodine into it. We also throw a water seal with a cork there and push the lid of the fermenter. This is disinfection. Iodine decomposes quickly, so it does not leave foreign odors and tastes. Instead of iodine, you can use special disinfectants, specialized stores sell them in disastrous quantities. Let's leave it like that.
After 50 minutes, we weigh 20 grams of Žatec and add it to the wort. These are hops for flavor.
15 minutes before the end of the boil, we connect the chiller to cold water and lower it into the wort. This is so that he has time to sterilize with boiling water.

Five minutes before the end of cooking, we add the remaining 20 grams of Žatec. These are aroma hops. In total, we will get about 20 IBUs (Bitterness Units). This is such a mild, pleasant bitterness.
Part of the wort is poured into a 100 ml beaker, which I forgot to write about in the equipment, and separately cooled strictly to 20 degrees to measure the density. We put the hydrometer there so that it floats and look at the value of the initial density (NP). In this recipe, we need to get 13.5% NP. If there is more, just add boiled water. If less, boil more. Although less is unlikely. In general, the output should be 28 liters.
(Here, unfortunately, a photograph from another brew, the hydrometer shows 14.5%)

Upon completion of cooking, turn on the water in the chiller, turn off the heat. The meaning of the chiller is that the wort must be cooled as quickly as possible from 100 to 20-24 degrees suitable for yeast. This copper spiral will do it in 15 minutes. If you take the tank to the bathroom and put it in cold water, it will take 40-50 minutes. And the longer the wort stays in contact with the air, the more likely it is to infect it with "wild" yeast or bacteria, which fly around in abundance.
During these remaining five minutes, we run to the fermenter, pour out the iodine solution from there. Those who wish can rinse with boiled water, but, in principle, it will do. Drain the chilled wort into a clean, disinfected fermenter. From a height of at least a meter.

The meaning of this action is that the wort, falling, is saturated with oxygen. Yeast, they are living creatures, they also need to breathe. For low initial gravity beers like this, this method will work, but high gravity beers require additional aeration.
We take the yeast in a flask, by this time they will already give abundant foam and pour it into the wort.
We close the fermenter with a lid, insert a water seal (without pouring anything into it yet) and for another five minutes, shake it for more aeration. Again, shaking a 30 kg container is a good exercise. We take the fermenter to a dark and cool place and only then pour either vodka or boiled water into the water seal. If you immediately pour liquid, then at the first attempt to raise the fermenter, this liquid will instantly be sucked in.
All. Now wait 14 days. And, one more clarification: S-04 yeast requires a fermentation temperature of 18-25 degrees. If less, fermentation will be sluggish. If more, during the fermentation process they will release a bunch of esters, which will affect the taste and aroma of beer unpredictably. Therefore, it is desirable to maintain this interval during fermentation.
Here, they are wandering. Below - the previous brew is standing, carbonized.

Two weeks passed….
By this time, we went to the store and bought a pack of liter PET bottles with stoppers and a pack of glucose / dextrose. This sugar is better absorbed by yeast than the usual one and does not give a sour taste. Now it's time to bottle the "green" or "young" beer.
To begin with, we pour a bit from the faucet into a beaker and measure the final beer gravity (CP). I got 5%. Which, considering the temperature at which we mashed (more unfermentable sugars) is quite normal. According to the table we find the alcohol content - 4.5%. Light and "full-bodied" beer, as expected.
In order for the beer to be saturated with carbon dioxide, it is necessary to add a bit of glucose to each bottle, since everything in the wort has already been eaten. Having eaten this sugar in a closed bottle, the yeast will just saturate the beer with gas. This is called "natural carbonation", as opposed to artificial saturation with carbon dioxide under pressure in kegs. There is, in fact, no difference. In this recipe, comrade Rhinoceros indicated 7 g / liter, so add 7 grams of dextrose or glucose to each bottle.
We open the fermenter, a couple of minutes go crazy from the smell. Then we take our silicone tube (previously disinfected) or a special siphon, fill it with boiled water and, holding one end with a finger, lower the other into beer. The principle of the siphon, yeah, the fermenter should be higher than the bottles.
By the way, here, if a tube is still used, the help of another person is needed, preferably homo sapiens. All these gestures are in order to take the beer from above without touching the sediment, which will be 2-3 centimeters at the bottom.
Well, we remove the finger, wait until the water pours out somewhere and the beer goes and lower the tube to the very bottom of the bottle. Again avoid excessive contact with air. We fill the bottle. When three or four centimeters remain to the neck, we squeeze the bottle, squeezing out the air and close the lid. And so many times.

When everything is spilled, we leave these flounder-like bottles also in a dark and not necessarily cool place. One week for carbonation. During this time, the yeast will eat glucose, the bottles will inflate and become stone. By the way, it will also be a natural preservation. There is nothing to eat there, there is no oxygen either, there is no contact with air. Beer in PET bottles can be stored quietly for six months (no longer is necessary, after all, gas exchange occurs through the pores of plastic), and in glass for several years. After carbonation, the beer needs to be aged for another month, but I started opening it after a week. I'm not iron. Although after a month of exposure, it definitely got better. True, by that time half of the cooked was left ....
Well actually everything. This method does not claim to be the only correct one. I wrote the way I did. There is an abyss of options here. But with this set of pots, you can cook whatever your heart desires. And my soul is capricious and restless.

Beer is a popular drink due to its low cost, variety of varieties and walking distance. It is easy to buy a bottle or two to pass the evening with friends at any nearest outlet. However, can we be sure of its quality and the absence of harmful additives? Unfortunately, not always.
Most types of drink contain a huge amount of preservatives, dyes, flavoring and food additives. Live is no exception.
It is not necessary to give up your favorite alcohol, it is easy to prepare it yourself and be sure of the quality and safety of the product. Today we will talk about how to brew beer at home without equipment.
How to make beer at home without equipment
Natural beer, brewed by yourself and with love, has a rich taste and lush foam, and is also more healthy due to the absence of preservatives and other additives. Not a single store analogue can be compared with it in these indicators.
The main components of the drink are natural ingredients: malt, brewer's yeast, pure water and hop cones. And for its preparation it is not at all necessary to purchase expensive special equipment, you can completely manage with improvised kitchen utensils.
We will answer how to make beer at home without special equipment. From the mandatory inventory, a novice brewer should have:
- Large saucepan (displacement depends on the volume of ingredients, preferably more than 30 liters);
- A glass container or cylinder (in which the product will be fermented directly);
- Thermometer (to track the temperature of the wort);
- Silicone hose, narrow to drain the beer without touching the sediment;
- A piece of gauze fabric (about 5 meters for making a bag for malt);
- Bath with cold water (for cooling beer);
- Bottles for spill with caps (plastic or glass);
- Water seal;
- Light plate, iodine for starch test in liquid.
Important: It is advisable to sterilize the equipment for brewing a foamy drink. Otherwise, the harmful microflora that got into the wort will spoil the process.
Another important point in brewing is the requirements for water quality. It must be clean, without impurities and odors. It is better to take spring or bottled. Making homemade beer yourself with it will not be much more expensive, and the taste will be much cleaner and softer.

Easy Hop Recipe
Homemade beer, brewed with one's own hands, means as much to a true connoisseur as chocolate Factory for Willy Wonka. However, if there is no brewing experience, then it is worth starting with the simplest, so that the result exceeds expectations and inspires further experiments.
We offer a simple recipe on how to brew beer at home without hop equipment.
The following components will be required:
- Purified water - 27 liters;
- Hops (acidity not higher than 4.5%) - a little less than 50 grams;
- Malt - 3 kg;
- Yeast - 30 grams;
- Sugar - 200 gr. (per 1 liter of liquid - 8 grams).
All basic ingredients are easy to find in stores or specialized outlets, but there are some requirements for them:
- Malt. It is better to purchase it from Czech or German production, because. domestic is much inferior in quality. Pay attention to the color, in a quality product it is white. The taste should be slightly sweet and the smell pleasant. If you buy ground malt, then the husk should not be damaged, it is a natural filter;
- Hop. It can be bitter or fragrant, here everyone chooses to taste. But the color of the cones of a quality product must be reddish or yellowish;
- Yeast. Be sure to take special beer and the highest quality. After all, the process of fermentation depends on them.
Cooking:
- Pour water (25 liters) into the pan, heat up to 80 degrees (Do not forget to use a thermometer to measure the temperature);
- We prepare the malt bag: we fold the cheesecloth in 4-5 layers to get a square meter by meter. We pour malt into the middle, tie it up and lower it into water for about an hour and a half. The temperature should be maintained around 72 degrees. The strength of the finished beer will be lower, but the taste will become much more intense.
- After the time has elapsed, it is necessary to conduct an iodine test for the presence of starch: pour about 10 ml onto a plate. decoction, add a drop of iodine. If the color has changed to blue, then boil for another 15 minutes. If by that time everything is ready, then 5 minutes at 80 degrees is enough;
- Now we take out the malt bag, wash it in the remaining 2 liters of water. Then we add them to the main volume of the liquid. This manipulation allows you to bypass the filtering process;
- Now let the resulting broth boil and add 1/3 hops to it. Half an hour later, the second part, after another 40 minutes - the remaining third. Boil for another 20 minutes.
- Now it is necessary to cool the beer very quickly (literally within half an hour to 24 degrees) in order to avoid infection with wild yeast. We transfer the pan to an ice bath (for the best effect with salt water), filter three times into another container through cheesecloth.
- The next step is adding brewer's yeast to the wort. They must be diluted in accordance with the instructions on the package, then thoroughly mixed with the liquid. After we install a water seal and send it to a dark place for a week and a half to roam. The water seal will release bubbles of carbon dioxide. As soon as the process stops (there will not be a single bubble in a day), you can proceed to the next step. By the way, at the end of fermentation, the beer will acquire a lighter pleasant shade.
- To fill the drink with carbon dioxide, add foam to it and improve the taste, it is necessary to carry out carbonization. Add sugar to sterilized bottles (8 grams per 1 liter of beer). Now carefully pour the liquid into the container through the rubber hose, trying not to touch the sediment at the bottom of the pan.
- In order for the drink to "breathe", it is necessary not to add about two centimeters to the edge of the neck. We seal tightly. During this period, secondary fermentation begins, which will give the beer a final finishing touch.
- We also send the foam masterpiece to ripen in a dark place with a temperature not higher than 23 degrees (but preferably not lower than 20) for 2 or 3 weeks. After a week, the bottles should be shaken periodically.
- After maturation, such beer must be stored in the refrigerator.
As you can see, the recipe is quite simple and not labor-intensive. And all the time spent will more than pay off when you uncork the bottle and taste the results of your own work.

How to brew beer at home without equipment: video
Before cooking, we suggest watching a couple of videos on how to make beer at home without equipment.
Is it possible to brew beer at home without special equipment
Most beer connoisseurs would love to try making their own, but find that it can only be done with a minibrewery or other expensive equipment and don't want to spend the extra money.
And rightly so, because it is not. This myth is strongly imposed on us by manufacturers of such goods; by the way, you can also buy ready-made concentrate for making beer from them. But will it be natural and will it differ greatly from what is openly sold in any store? And given the cost of equipment and raw materials, the cost of such a drink will significantly exceed even the most expensive store varieties.
Do not rush to buy expensive appliances or run to the store for low-quality alcohol. Brew your own beer according to this recipe and appreciate its unique taste.
More interesting things on our website.